
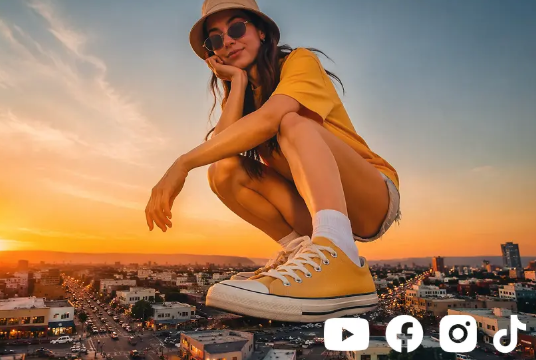


The photographs on your phone may hold the best parts of a trip: a view from a train, a meal shared with friends, or a quiet street you nearly walked past. Yet putting dozens of pictures into a slideshow does not always bring the experience back to life. Dreamina’s ai video generator can add movement to a written idea or a reference image, giving travellers and creators another way to shape their pictures into a short video with a clear sense of place.
A social media video does not need to show every stop. A clear opening, a handful of connected moments, and an ending that gives the viewer a reason to respond can turn travel photos into a story worth sharing.
Choose a story your social media audience can follow
Before choosing music or effects, decide what a social media viewer will take away. A travel creator might share the character of a neighbourhood, a useful part of planning a visit, or a personal moment from a trip. A recap for friends may simply capture the feeling of a shared weekend. Each purpose calls for a different selection of photographs and a different caption.
A useful way to focus a post is to complete this sentence: ‘After watching, someone will understand or feel …’ The answer might be what a morning walk felt like, how a journey unfolded, or why a particular detail stayed with you. You do not have to turn every post into a travel guide, but a viewer who does not know you needs enough context to follow it.
Choose a simple focus that connects the pictures. It could be a single day, a journey between two places, the food discovered along the way, or the quiet details that made a trip distinctive. A clear focus helps you select images and gives the final video a shape without requiring an elaborate script.
Find the photographs that carry the story
Gather your pictures in one place and make a first selection without worrying about the final order. Look for a mixture of wider views, people or activities, and smaller details. A landscape can establish where you are; a close view of a ticket, a table, or a doorway can reveal something about the experience.
Do not choose only the technically perfect images. A slightly imperfect photograph may hold an expression or a moment that matters more than a polished view. On the other hand, an image that is too blurred to understand or too dark to see on a phone may need to be left out, even if it has a special meaning to you.
Remove near-duplicates unless the difference between them contributes to the story. Five almost identical views of the same street may slow the video down, while one wide view and one detail can show both the setting and what caught your attention. Fewer, carefully chosen images often give each moment more room.
Check which pictures you have permission to share. Friends, family members, and strangers may not expect to appear in a public post, even if they were comfortable being photographed at the time. Keep the original files and make a separate working selection so you can revise the edit without losing the source material.
Give the video a beginning, middle, and ending
A straightforward sequence can make a collection of photographs feel like a journey. On a social feed, open with a striking image or a clear line that quickly tells viewers where the story is going. A distinctive view, an unexpected detail, or a simple statement about the day can work. It does not need to be the first picture taken; choose an opening that sets an accurate expectation for what follows.
The middle can move through a few connected moments. You might follow the route through a neighbourhood, show how the day changed from morning to evening, or group images around a particular experience. The order should feel natural to the story, even if the pictures were taken over several days.
An ending can offer a sense of completion without summarising everything. A final view from the journey home, an image of the last meal, or a quiet detail that stayed with you can give the viewer a place to pause. Choose an ending that fits the feeling of the video rather than adding a dramatic finish simply because it is available.
If the video is intended as an accurate record of a trip, avoid rearranging images in a way that changes what happened or where an experience took place. A personal montage can be selective and creative while still being honest about the moments it represents.
Choose where movement adds something
Movement is most useful when it supports attention or atmosphere. A gentle change in framing can help someone notice a detail in a photograph. A subtle motion in a landscape can create a sense of a passing moment. A still image may be the better choice when the expression on someone’s face or an important detail is already strong enough.
The video tool can create clips from written descriptions or use an image as a reference. A traveller might start with a photograph they took and explore a short moving treatment, or create an illustrative transition inspired by the general mood of the trip. The resulting clip can then be combined with original photographs, existing footage, text, and sound in a separate edit.
Keep changes modest when the photograph records a real place or person. Generated motion can alter buildings, clothing, facial features, or background details. Watch the entire clip rather than checking only the first frame, and compare it with the original image. If a change makes the scene look misleading or distracts from the memory, use the still photograph instead.
Some video tools also offer options to refine aspects of a scene. This can be useful when a visual direction works but a particular detail needs adjustment. The outcome still requires review: changing one area can affect nearby objects or movement, and a result may not preserve every feature exactly.
Keep real memories and imagined scenes distinct
Creative additions can make a travel video expressive, but viewers should be able to understand what they are seeing. An animated transition or a clearly stylised scene can convey a mood without claiming to be footage from the trip. A realistic generated view of a landmark, hotel, or activity may create a different expectation.
If the video offers practical travel advice, use your own accurate photographs and footage to show details that influence a decision. An invented view should not be used to demonstrate the condition of accommodation, the appearance of a real route, or the services available at a destination. Check information such as opening times and access arrangements through the relevant source before sharing it.
Where a realistic generated scene could be mistaken for documentary footage, label it or explain its role. Different platforms may also have rules about disclosing altered or generated content, so check the current requirements where you publish. Clarity protects the viewer’s trust and makes room for creative interpretation.
Be especially careful with people’s likenesses. Do not create an impression that someone visited a place, said something, or participated in an activity if they did not. When a video is a personal gift or a private memory, discuss any changes to someone’s image with them before sharing it more widely.
Add words and sound that support the pictures
Text can orient a viewer without turning the video into a list of captions. A place name, a date, or a short line about why a moment mattered may be enough. If the video gives practical information, keep the wording specific and check that it remains accurate before publication.
Use readable text with sufficient contrast, and leave it on screen long enough to be read. On a phone, small lettering can disappear against a detailed background. A quiet area of the image or a simple background behind the words can make the message easier to follow.
Sound adds another layer of memory. You might use a recording you made, a short voiceover, or music for which you have the appropriate permission. A spoken description can make the video more personal, but it is not essential; sometimes the sound of a place or a restrained musical track is enough.
If people speak in the video, add and review captions so viewers can follow without sound. Check names and place names carefully, particularly when captions are generated automatically. Consider a text description for meaningful visual content where the platform supports it.
Prepare your travel video for social media
Choose the intended social media placement before making the final crop. A vertical frame is often convenient for phone-first short videos, while other placements may favour a square or wider composition. Check the current upload requirements for the platform and placement you choose; they can change. Select a tighter group of images for a short post, but allow enough time for each important moment to register.
Keep important faces and details away from edges that may be covered by platform controls or lost in a crop. If a wide landscape is central to the story, do not crop it so tightly that the place becomes unrecognisable. You may prefer a layout with a border or a different image rather than forcing every photograph into the same shape.
Watch the sequence from beginning to end without pausing to edit. Notice where your attention drifts, where a caption disappears too quickly, or where a transition feels more prominent than the moment itself. Remove an effect if it does not contribute to the story, and give important images enough time to be understood.
Before posting, preview the export on a phone. Check the opening frame, readability, audio levels, captions, and any disclosure. Select a cover image that makes the subject recognisable in a profile grid, and confirm that its crop does not hide the place or title. Review each platform’s current music permissions and content rules, particularly for business or promotional accounts.
Write a caption that adds useful context
Use the caption to add information that the video cannot comfortably hold. Mention the destination when appropriate, share a brief observation, or explain the context behind a moment. If you include practical details, verify them and note when your experience took place. A few relevant descriptive words or hashtags can help clarify the subject, but there is no guaranteed formula for reach or rankings.
Invite a response that fits the post, such as asking viewers which part of the journey they would like to learn more about. Reply to genuine questions when you can, and avoid adding a forced call to action to every video. Keep the original photographs and project files separately, and record any permissions from people who contributed images.
A social media travel video does not need to reproduce every detail of a journey. Choose a story your audience can follow, use movement where it helps, and be clear about any imagined scenes. A thoughtful edit and an informative caption can make the experience enjoyable to share while keeping the real trip at its centre.